In contrast to the old-fashioned and complex mortise locks, the majority of the locksets available today are cylindrical and are easy to set up. In essence, the installation process requires an enormous hole to be drilled through the front of the door, and one smaller hole that is drilled along the side. After drilling the holes the toughest task is cutting mortises for the latch and strike plates.
Two factors are essential to an effective Install A Lockset: a meticulous layout along with sharp and precise tools. Alongside tape measure and a square combination and hammer, you’ll require scratch awls, 21/8-in. hole saw and an 15/16-in. spade bits, as well as a 1 in. chisel. The process of assembling the lock sets varies between brands and it’s therefore crucial to review the instructions of the manufacturer.
Stabilize The Door, After Which Make The Small and Large Holes
Step 1. Utilize a square combination to design. The majority of locksets include an outline of paper to locate the face as well as the edge bore. It’s much easier and more precise to make use of a combination square, particularly when you have more than one set of locks to put in. Begin by pushing the door open halfway with two shims on the lower edge. Mark the door’s face from both ends, approximately 2/3 inches. from the top edge of the door (2 3/4 in. for doors that are exterior) and generally 36 inches. of the ground. Its edge is located at the center of the door to match the markings on the face.
Step 2. Pilot holes make ways for larger parts. To ensure that those holes that will be used for the cylinders are in the correct spot and don’t drift using a scratch awl, you need to mark the exact starting points. After that, drill pilot holes using 1/8-in. bit on the edge, and on both sides of the door.
Step 3: First, drill the bore on your face. While holding the tool at a in a level position and bringing it to the door and drill halfway through one side using an 21/8-in. hole saw. After that, you can finish the bore on the opposite side of the door.
Step 4. Make use of a nail as a marker to determine the middle of the strikeplate. Close the door, and hold it in place until the stop. Then, push an 8-d nail into the 1/4-in. pilot hole on the door edge until it touches the jamb of the door; a pry bar can be used to leverage the door should it be required.
Step 5. Make holes to the latch as well as strike with a 15/16-in. spade bit. (A 7/8-in. bit isn’t enough for the majority of latch mechanisms, as the gap left behind by a 1 in. bit will not be completely covered in the latch plate.)
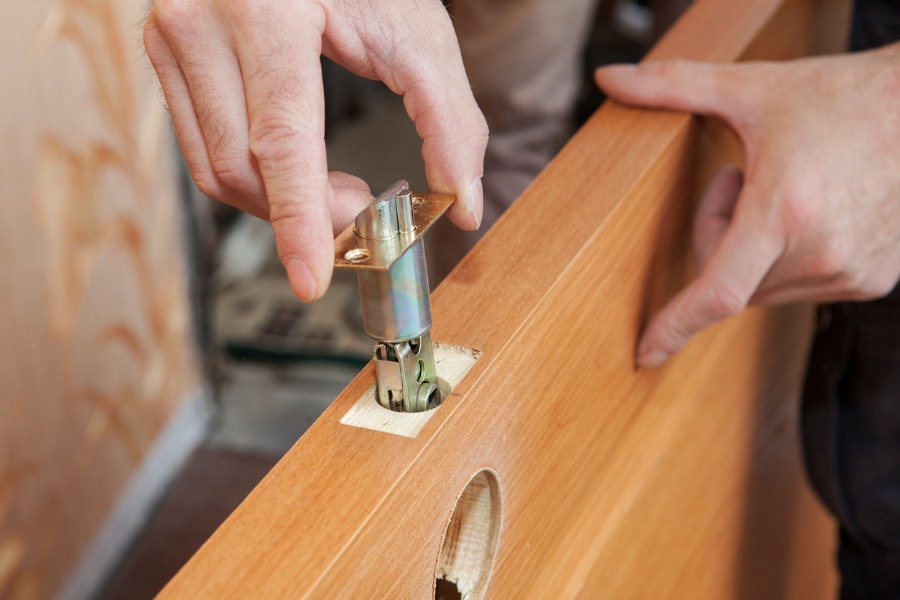
Step 6: Utilize the latch as a guide. After drilling the hole in the edge bore and inserting the latch mechanism , and attach it with the screws supplied. After that, trace around the edges using the sharp edge of a utility knife. Take care when cutting vertically across the grain as the knife could be able to wander. Some carpenters use scratch awls for cutting across the grain.
Step 7. Make sure you take your time using the chisel. Use a chisel that is sharp at approximately 45deg to the workpiece, and cut the surface of the mortise using a gentle tapping the chisel using an hammer. Cut the grain in small increments of 1/8 inches. or so. After that, cut off the scrap and work the chisel towards the center. Verify the alignment on the plate. it should be close to the door’s surface. If you find yourself carving too deep, you can cut the cardboard piece to make the latch plate in line to the edge of the door.
Step 8. Set the strike in line and the latch. Close the door and then transfer the bottom and top edge of the plate onto the jamb on the door. Then, measure the distance between the edges of the door and the interior front of the door and then leave the equal distance between the reverse of the striker and the top of the door. For 1 3/8-in. doors (if you have the lock placed correctly) the door’s opening should be a solid 1/8-in.
Step 9: Make a cut in the mortise strike using the same method used to cut the latch plate.